Simple Economy Challenge
Last updated on 27th January 2026
Building a Simple Economy Model
In this exercise you will build a very basic simulation model containing a single agent type with only a single variable. The model you will build will consist of simple agents that have a wallet and the ability to randomly select another agent at each step and send them £1. If an agent has run out of money, they must wait until they receive more money before they can randomly send money again.
The flow of the model is as such:
- Initialize Simple Agents with
walletparameter and fully connect them to all other agents. (only at beginning) - Each Simple Agent chooses another agent in the system at random and sends them £1.
- Each Simple Agent that has a message will accumulate the value of the messages and increment their wallet.
if at any point a Simple Agent does not have money, it must wait until it receives money from another agent before it can resume sending.
The Simudyne SDK uses a message passing framework to handle the communication between agents. It may differ from other frameworks you've used previously and this challenge will help you grasp the fundamentals of defining a model, agents, links, messages and actions with the Simudyne SDK.
The output of this model is quite simple but is an example of how wealth distribution can emerge from a single simple set of interactions.
Below is a starter project that contains the necessary files to get started as well as an answer key should you require any assistance or want to validate the results.
Download Challenge Base Model Download Answer KeyThe exercise consists of 3 parts and should take no longer than 2 hours to complete:
- Defining main model class
- Defining agents & network
- Defining behaviors
Each section contains a set of numbered TODOs that you will need to complete in order to successfully complete the challenge.
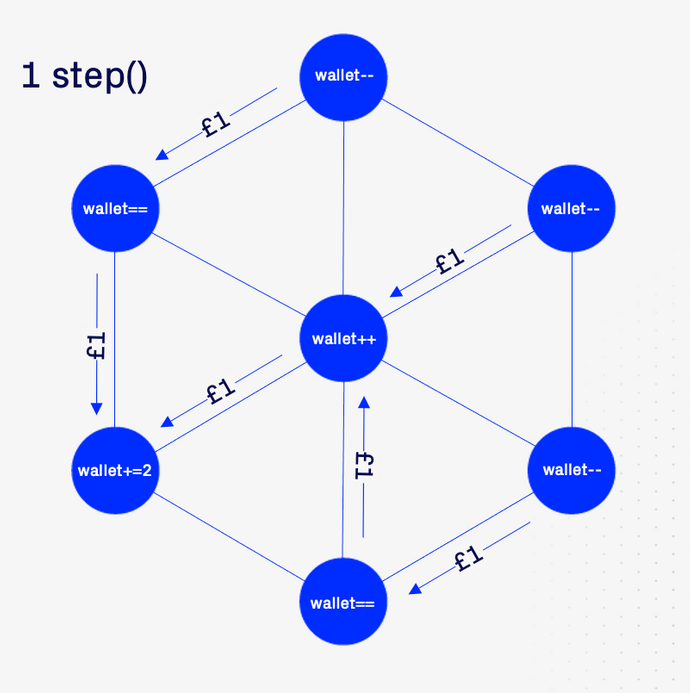
Below is a diagram to help visualize the flow of money in each step, every step consists of a check to see if the agent has money, if true, then the agent sends £1 to another agent at random. Agents can receive multiple payments in a single step, but can only send 1 at a time.
Defining the Main Model Class
In this section you will define the main model class that contains the 2 main functions of your agent-based model: the step() and the setup()
Step 1: The Global State
All the agents in your model are connected to the same Global State. This Global State class is accessible to every single agent in the system, making it the ideal place to store system level parameters or data structure that you would expect all of your agents in the system to have access to.
Agents can access the GlobalState by calling getGlobals().
Open the starter model project that you downloaded above, it should contain a structure that looks like the image below:
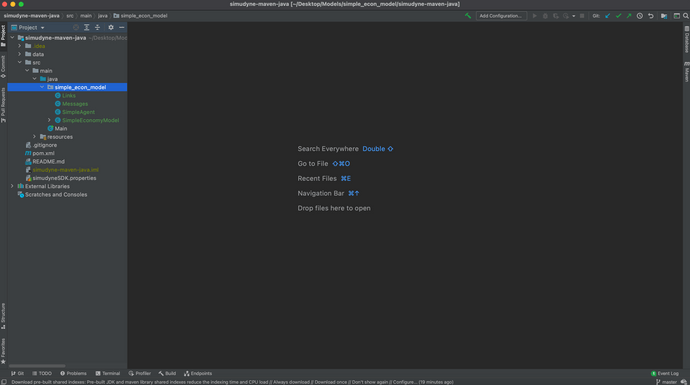
The project already has your classes and structure of those classes pre-defined for you so you will just need to start with your first TODO.
This section contains 2 TODOs:
- Add a field of type
longto store the number of Simple Agents for your simulation - Add a field of type
intto store the starting value of the wallets of the simple agents
TODO 1 (Number of Agents)
Add a field of type long with a starting value of 100.
Tag the field with an @Input annotation. This annotation will expose the field to the console making it easier to modify between runs.
TODO 2 (Starting Wallet)
Add a new field of type int with a starting value of 100.
Tag the field with an @Input annotation.
This value will be used when generating your Simple Agents, so you can modify the starting wallet from the console.
Defining Agents & Network
In this section you will generate a Group of agents and connect them to one another. This functionality is contained in the setup() method and can either be data driven, where the agents and network are generated automatically from a data source, or they can be generated using built in topologies that are common in many agent-based models.
The Setup
The setup() is executed right at initialization and is where all the logic for the generation of your agent populations is located.
The general structure of this function is to first generate groups and then connect those groups using a topology generator. These groups of agents can be generated from data or directly defined in your logic.
This section contains 3 TODOs:
- Generate a Group of Simple Agents
- Fully connect the Group of Simple Agents
- Register your agent and link with the model schema
TODO 3 (Generate a group)
Add a field of type Group<SimpleAgent> and assign it using the generateGroup() feature. More info on group generation can be found here Groups.
Note that this functions takes in 2 arguments:
- The class of agent you want to generate in the group
- The number of agents that you want to generate in that group
Once you have the above completed, open a lambda and assign the field called wallet on the agents with the value you created above in the Globals. (use getGlobals() to access the variable)
TODO 4 (Connect the group)
Connections between agents can either be created by ingesting data on the network or by using one of the common topology generators built into the SDK.
In this instance we will use a built-in topology generator called fullyConnected(). More on topologies can be found here Connections.
Use fullyConnected() to connect all of your agents. Notice that this function requires 2 arguments: a target group and a class of Link to establish between your agents.
A Link has already been defined for you in the Links.java class called SimpleAgentLink.class.
TODO 5 (Register agent and link)
In the init() function, you will see 2 methods being called: registerAgentTypes() and registerLinkTypes(). Any Agents and Links used in your models must be registered here so that the SDK knows the structure of the data it needs to output.
Add your Agent class, SimpleAgent.class and your SimpleAgentLink.class to their respective function.
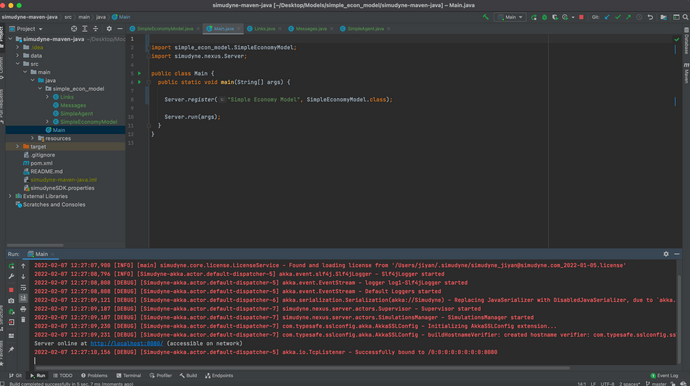
Now that this is complete, we can validate that we have generated a fully connected network by running our Main.java. Once the model has been compiled you will see a url indicating that the simulation is active on the local server:
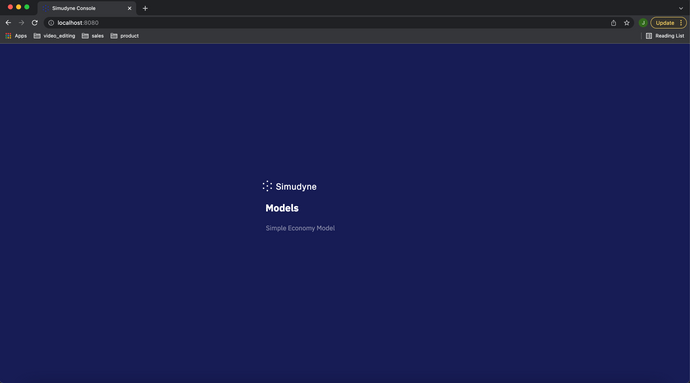
Click on the url and a console window should open in your default browser like so:
Click on your model, and you should see a dashboard like the image below:
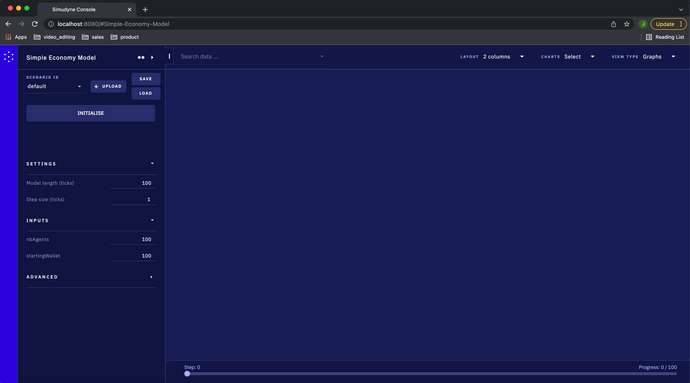
Notice that on the left hand panel you can now see the 2 input parameters that were defined in the Globals.
Hit initialize and your console should be showing a single chart called wallet as below:
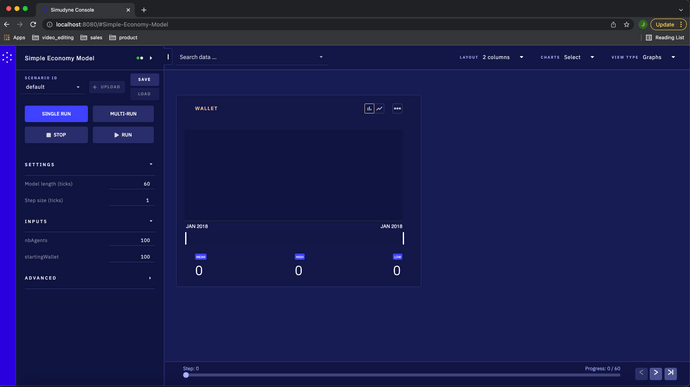
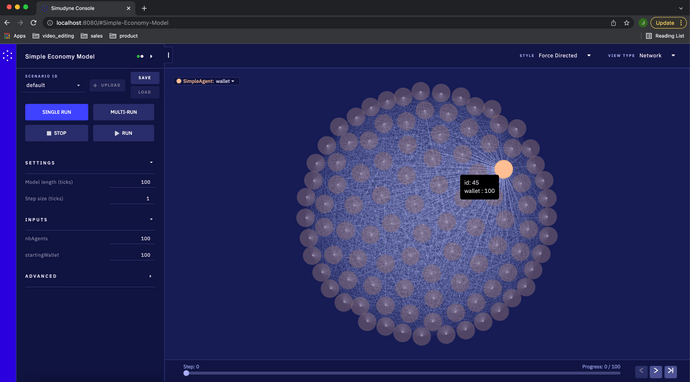
Click the VIEW TYPE drop down menu in the top right that says Graphs and select the Network view option. You should be able to see a fully connected network of agents, if you hover over one of the agents, you should see that their starting wallet is set to 100:
Now that our agents have been initialized and connected, we can define their interactions and behaviors.
Defining Behaviors
In this section you will define the logic of the 2 behaviors, or Actions, of the Simple Agents. Remember that the Simudyne SDK uses a message passing framework and interactions between the agents are facilitated via the sending and receiving of Messages.
The Step
The step() function contains the logic sequence of behaviors that we expect to be executed at every time step. This function is where you will define run sequences which contain a message passing phase.
A run sequence contains a sequence of Actions where each Action sends a message and immediately afterwards that message is handled by the agent receiving the message. More info on how actions and sequencing works here Communication.
TODO 6 (Calling Actions)
create a new run sequence in the step() method in your SimpleEconomyModel.java class.
There are already 2 shell actions defined in your SimpleAgent.java class. The actions should be called in your sequence in the order that information flows.
Your Actions should have a structure similar to below, but with the unique Actions for this model:
run(Agent.sendMessage, Agent.receiveMessage);TODO 7 (Sending a message)
Go to your SimpleAgent.java class where you should see 2 shell actions named sendMoney and receiveMoney. In this TODO you will be defining the logic in the sendMoney behavior.
The behavior is as follows:
- Check that the agent has money, if true then,
- Collect the agents links using
getLinks()into a temporary list - Shuffle the list in a random order
- Select the first element of that list (a Link) and store the ID of the agent on the other side of the link using
getID() - Send a message to the Agent at the other end of the Link by calling
send().to() - Decrement the wallet by 1
Note that you already have a message in your Messages.java class.
Also, the functions mentioned above in the description of the behavior all require arguments (except for getID()) that indicate the class of Message or Link you want to send or retrieve.
TODO 8
The agent needs to receive all messages that were sent to it and increment its wallet by 1 for each message it has received in the step.
The behavior is as follows:
- Retrieve messages from step and iterate over them using
getMessagesOfType().forEach() - For each message, increment the wallet by 1
Note that you will be getting the same message type that was sent in the previous Action
Evaluating your model
Your model is now complete, you should be able to run your Main.java and run your simulation.
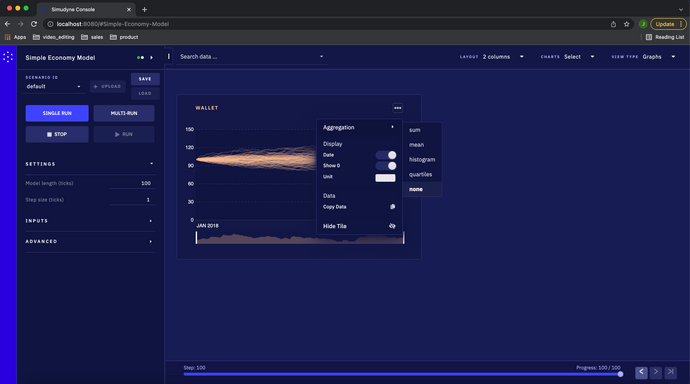
To validate that the model is working correctly, go to the console, hit initialize and then hit run. You should get a window that looks like the below:
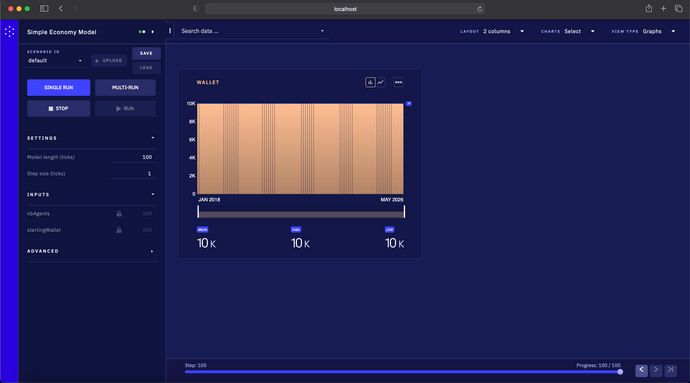
Because our graph is currently in an aggregate view and plotting the sum of all wallet variables on our agents, we want to change the view. Select 3 dots in the corner of the tile, go to Aggregation and select none
Conclusion
You've completed your first simple model in the Simudyne SDK!
This is not quite a true ABM, but it's a great start for layering in more complex behaviors and interactions.
You can extend this model however you see fit or use the same structure you just developed and apply it to another system of interest.
Feeling confident in your abilities? Try a more difficult challenge here Synthetic Market Challenge.