

SIR Epidemiology Tutorial
Last updated on 27th January 2026
Overview
In this introductory tutorial, we will cover all the components needed to build the classical agent-based Susceptible, Infected, Recovered infection model.
In our implementation we will build a fully connected network of people agents in which some initial portion of the population will be infected with an infectious disease. At each step in our simulation, infectious people agents have the possibility of infecting a susceptible agent based on a user-defined infection probability.
Realistic infection dynamics emerge from the model based on the simple rule above.
This tutorial is structured in 3 sections:
- Project Structure
- Model
- Console
The code for this tutorial is available as a zip download, containing a complete model as a Maven project. This project should be able to be run from any Maven or Java IDE environment.
Download Tutorial Files View Online DemoProject Structure
The downloaded zip consists of files defining a Maven build. Some of these files will be common to every Simudyne model project, while others are specific to the model being built.
/README.md                # Human readable description
/pom.xml                  # Maven configuration (dependencies, etc)
/simudyneSDK.properties   # Simudyne SDK configuration
/.gitignore               # Git version control ignore rules

/src/main/resources/log4j.properties              # Logging configuration

/src/main/java/Main.java                          # Application entrypoint
/src/main/java/SimudyneSIR/SimudyneSIR.java       # Model class
/src/main/java/SimudyneSIR/SirAgent.java          # Agent class
/src/main/java/SimudyneSIR/Messages.java          # Message classes
/src/main/java/SimudyneSIR/Links.java             # Link classes
Project configuration and documentation
The top level files define some project configuration and helpful documentation.
README.mdis a markdown file, and a good place to put documentation relating to the model for others (and yourself) to refer to. If hosted on version control services such as GitHub or BitBucket then it will display nicely to other users.pom.xmlcontains the Maven configuration, and is where you can change or add dependencies to your project. This is important for changing version of the SDK, as well as adding additional libraries you may need for modelling.simudyneSDK.propertiesallows configuration of the SDK libraries, such as enabling, disabling or tuning certain features..gitignoreis a file for the Git version control system, to ignore certain files from being tracked. These files include files generated by compilation (inside thetargetfolder) as well as caches created by IDE programs such as IntelliJ or Eclipse.log4j.propertiesinside resources defines a default logging setup, writing helpful information to the console. More information on configuration of logging can be found in the reference.
Model definition
The files under /src/main/java define your project.
Main.java defines the entrypoint for your application. The included file is setup to simply register the SimudyneSIR (with a name) and start the server. Your project can include multiple models, but you should think carefully if you need to collaborate with others. A separate project per model will make collaborating and versioning each individual model easier.
The model files themselves are then inside SimudyneSIR. The Java convention is to use packages, where a package matches the folder structure to the file itself. So the model class models.SimudyneSIR is located at models/SimudyneSIR/SimudyneSIR.java.
SimudyneSIR.javadefines the model itself (referred to as the Model class).- Agents are then defined in their own files, each defining a single Agent class of the same name.
- By convention, message and link classes are nested inside a wrapping class, to help reduce the number of files.
Model
The Model class (SimudyneSIR, inside SimudyneSIR.java) is the root of your model. Broadly, it ties together 3 concerns:
-
Initialisation
- Define global state, including accumulators
- Define inputs and outputs of the model
- Register Agent and Link types
-
Setup
- Create the agents within the model (from the console, this is what happens when the Initialise button is pressed).
-
Simulation
- Define a
stepmethod which moves the simulation from one tick to the next.
- Define a
Initialisation
Initialisation covers any top level fields on the model, the Globals class, as well as an implementation of the init method.
Model Fields
Defining inputs and outputs can be done through fields on your Model class. These define model-level properties that only the top level model has access to (agents cannot access these). These fields are useful for defining model constants needed for setup, as well as variables that are computed by the model at the top level.
SimudyneSIR.java
 @Constant(name = "Number of SIR Agents")
    public int numAgents = 100;
Fields (on the model, as well as within Globals or on Agents or Links) can be annotated to make them visible to the SDK. There are 3 common annotations needed for most models:
-
@Inputdenotes a field as being accessible by the outside world, and available at any time during the simulation. This is useful for parameters that may be controlled by an end user, or exogeneous factors to be varied by scenarios. -
@Constantdenotes an@Inputwhich can only be changed prior tosetup. This is useful for fixed parameters of the model, such as the initial number of agents, which will make no difference aftersetuphas been called. -
@Variabledenotes an output of the model, which is available only aftersetuphas been called. This means it is safe for fields marked as@Variableto be uninitialised, as long as they are initialised by thesetupmethod.@Variablecan also be used to annotate methods. The method must take no argument, and return a supported type. The method will only be called aftersetuphas been run, and so can depend on internal state such as agents being initialised.
Globals
Simudyne ABM makes visible to all agents a single instance of a class extending simudyne.core.abm.GlobalState, as defined by the type in extends AgentBasedModel<SimudyneSIR.Globals>. This class may exist in another file, but by convention it is placed inside the Model class as a public static final class.
Fields on the Globals class can be annotated as with fields. The console interface will treat any annotated fields on the Globals just like fields on the Model class itself.
The Globals class is accessible to all agents within the system, however agents should not mutate (change) any fields in this object. Because agents operate in parallel, the results of agents modifying any information in the Globals class is undefined. Agents should instead contribute to global statistics either eagerly (through Accumulators) or lazily (through model-level queries into agent state).
SimudyneSIR.java
public static final class Globals extends GlobalState {
    @Input(name = "Infection Probability)
    public double infectionProbability = 0.01;

    @Input(name = "Initial Outbreak")
    public int initialOutbreak = 1;

    @Input(name = "Infection Duration")
    public int infectionDuration = 1;
 }
Fields marked as @Input allow you to change the values from the console. These parameters are selected by default and are used to tune the infection dynamics in the model. These parameters can be accessed by agents in the system and can be used by the behaviours on the agents.
Accumulators
Accumulators can be thought of as named numeric counters that agents can read, add or remove from. As agents act in parallel, they will not see updates to the accumulator within a single phase (even their own), but every agent will see the same value of the counter on the next phase (with all changes to the accumulator from all agents summed together).
Accumulators can be either Long (64bit integer) or Double (64bit floating point), created through createLongAccumulator/createDoubleAccumulator.
SimudyneSIR.java
	createLongAccumulator("susceptible", "Number of Susceptible");
    createLongAccumulator("infected", "Number of Infected");
    createLongAccumulator("recovered", "Number of Recovered");
We have created 3 accumulators, identified by a key, e.g. susceptible, and a friendly display name for the console, e.g. Number of Susceptible. Note that the display name is optional so you could have createDoubleAccumulator("susceptible") if you were happy with that name appearing on the console.
The susceptible, infected, and recovered accumulators are used to report the state of an agent so we can track the dynamics of our infection and track the number of agents in each state.
Type registration
As part of initialisation, you also need to register all Agent and Link types that will be used in the simulation. This allows the SDK to properly handle and output data for these types, even if they might be created dynamically.
SimudyneSIR.java
registerAgentTypes(SirAgent.class);
registerLinkTypes(Links.SirLink.class);
In this model we have two agent types, and a single link type, as shown above. We'll see how these Agent and Link types are brought to life next, in setup.
Setup
Topology
Where init is concerned with declaring the component pieces of a model, the setup method is concerned with declaring an initial state for our model using those pieces. At the time that setup is called, a user on the console (or other client to the model) will have had the chance to change inputs and constants. The setup method can then take these inputs and customise the creation of the model accordingly.
Creating the initial agents is done through the concept of a topology of groups. A group represents a parameterised set of agents, where each group has a type of agent, a number of agents in that group, and optionally an initialiser, which can customise the state for each agent.
SimudyneSIR.java
Group<SirAgent> sirAgentGroup = generateGroup(SirAgent.class, numAgents, a -> {
	if (a.getID() < getGlobals().initialOutbreak) {
	  // expose
	  a.status = SirAgent.Status.INFECTED;
 }});
In this model we have a group of people agents or SirAgent, the size of which is taken as an input. As part of it's logic, the SIR agent also needs to decide whether it will start the simulation in the infected state. The initial outbreak could be handled in a number of ways. We use a Java lambda function and use the agent ID's to create our initial outbreak.
The reason behind this choice is due to the fact that we only have one group of agents whose static ID's will be generated in the generateGroup loop function called above. Starting at 0, each iteration of the loop will generate a new agent with a unique ID incrementing by 1 at each iteration. This means the first agent generated in this group will have an ID of 0, the second agent generated will have an ID of 1, and so on.
Note that if there are more than one group of agents, the value of ID's of the second group will continue from the numbering that was left after the first group has completed generating. For example, imagine we have 2 agent groups; AgentGroup1 and AgentGroup2. if AgentGroup1 has 3 agents and was generated first, the first Agent ID of AgentGroup2 will be 3, the next will be 4, etc.
We're programmatically defining agents here, as it's quick to get started, but you can also load groups from external data sources.
SimudyneSIR.java
sirAgentGroup.fullyConnected(sirAgentGroup,Links.SirLink.class);With our group generated, we now need to give them knowledge of each other. This is done through links, which represent knowledge agents have of other agents. In the simple case, the link itself has no attributes, which means it simply represents knowledge that another agent exists. Here we use a pre-defined connector, which gives every agent in that group a link to every agent to the target group. There are many other strategies for linking agents together, including loading from data sources, detailed in the reference on topologies.
Here we give each agent a link to every other agent in the system. Links are unidirectional, and only visible to the originating group.
Super
A vital final part of setup is to call super.setup(). This tells the underlying system to actually initialise and setup the topology we have described. Usually this will be the last part of your setup method, however a useful pattern can be to call step at the final part of setup. This runs the model forward a step, and can be very useful to avoid a jump on a chart for example, should the agents need to run forwards initially to produce sensible values.
Step
Step is called once every time the model is run forwards a step. Step takes care of the logic that happens between each tick, in an ABM this is mostly concerned with running behavioural sequences over the system to move the system forwards through time.
Super
The start of step calls super.step, signalling to the system that another step is beginning. This performs general lifecycle hooks necessary for agents, and other tasks such as resetting any non-persistent accumulators back to 0.
Run Sequences
SimudyneSIR.java
run(SirAgent.step, SirAgent.exposed);we run a sequence of actions. In this model, this consists of running the SirAgent#step and SirAgent#exposed actions in sequence. The general idea is that at each step an infected agent will determine whether it will infect another agent and any agent that receives an infection message will become infected. We'll look at these behaviours in depth soon.
The important thing to note above is that only agents that receive messages get to act. The first action in any sequence is special, as at that point every agent gets to act (otherwise no agent would ever get to act, which would be unfortunate).
Behaviours
We'll run through the actions in this sequence in order, to see how they progress. When we see each agent for the first time, we'll also have a quick look at how it's defined.
SirAgent#step
SirAgent.java
public class SirAgent extends Agent<SimudyneSIR.Globals> {
  public enum Status { SUSCEPTIBLE, INFECTED, RECOVERED };
  public Status status = Status.SUSCEPTIBLE;  s
  public int timeSinceInfected = 0;
Our SirAgent is defined as an agent which has a status and a timeSinceInfected variable, as well as an enum for categorizing agents into their respective bins.
SirAgent.java
public static Action<SirAgent> step =
  Action.create(SirAgent.class, a -> {

	  if (a.status == Status.INFECTED) {

		  // Loop through neighbors and stochastically expose them
		  a.getLinks(Links.SirLink.class).forEach(l -> {
			  double val = a.getPrng().uniform(0, 1).sample();
			  if (val < a.getGlobals().infectionProbability) {
				  a.send(Messages.InfectMessage.class).to(l.getTo());
			  }
		  });

		  if (a.timeSinceInfected++ > a.getGlobals().infectionDuration) {
			  a.status = Status.RECOVERED;
		  }
	  }
	  switch (a.status) {
		  case SUSCEPTIBLE:
			  a.getLongAccumulator("susceptible").add(1);
			  break;
		  case INFECTED:
			  a.getLongAccumulator("infected").add(1);
			  break;
		  case RECOVERED:
			  a.getLongAccumulator("recovered").add(1);
			  break;
	  }
});
Our action is a function that operates on a given SirAgent. In this models formulation, each agent will check their status and determine whether they are infected or not. If an agent is infected, it will iterate through each of it's links of type Links.SirLink.class and stochastically expose (send an infection message) other agents.
Each agent has their own PRNG, available through getPrng(), which is similarly carefully controlled by the Simudyne SDK to be a good source of randomness, and controllable for repeatability. We use this random sample and check it against our infectionProbability which we retrieved through getGlobals() which grabs the value from the GlobalState.
If our random value is less than our infectionProbability then this condition will evaluate true and this agent will send an InfectMessage along the link in the loop.
We check the timeSinceInfected against the infectionDuration and set the agent's status to status.RECOVERED.
Lastly we update our accumulators with the current state of our agent for visualizing in our console.
Infected agents stochastically selected other agents to infect and sent a message to every agent it decided to infect. These message are empty messages, as defined in the Messages container class, serving as signal messages to other agents. A more elaborate model could add properties to the messages, however for our purposes we use this message to signal a state change.
SirAgent#exposed
SirAgent.java
public static Action<SirAgent> exposed =
  Action.create(SirAgent.class, a -> {
	  if (a.hasMessageOfType(Messages.InfectMessage.class)) {
		  if (a.status == Status.SUSCEPTIBLE) {
			  a.status = Status.INFECTED;
		  }
	  }
  });
Agents that were sent a message in the SirAgent#step action are now infected and must change their state from Status.SUSCEPTIBLE to Status.INFECTED. We call our hasMessageOfType() function to check if we received a signal message from another agent and change the status of the agent should it evaluate to true.
Console
The console is the visualization layer is one way to interact with your simulation and visualize the dynamics or statistics of your system.
From a command line you can run (with Maven installed globally) mvn package exec:java to run the server. This will download all library dependencies, build the project, run any tests and then run the Simudyne server locally with the web console. You can then open the server at http://localhost:8080/.
Once you've opened the local server, you will be greeted by the model selection landing page:

Clicking on "SIR Model" will take you into the console for that model. When the console is first opened, a model is not setup, and so there isn't much to show. The sidepanel contains the main controls for interacting with a models configuration/inputs.

Initialise will setup your model using the defined parameters. After setup, some things cannot be changed (such as the seed, or constants for the model). You can open types of inputs using the headers. In this model we have a single constant, defining the number of traders in the simulation, along with 3 inputs controlling parameters of the trading process.
For now we can leave things as they are, and click Initialise, upon which a few more elements become active.

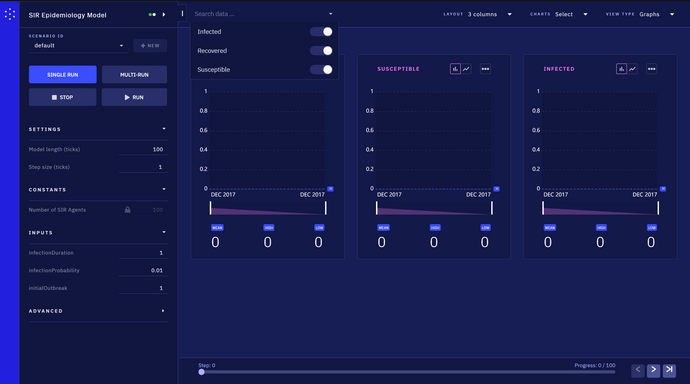
We now have a set of charts, showing different outputs of our model. Because we have only just setup, there is only a single tick of data to inspect. However, some of these charts are showing top level values, whereas others are showing aggregations over agent attributes. You can tell the difference by colour, and by the information in the lower left of agent level charts, showing the type of agent, and how many agents of that type are present.
In this model, there are only 3 charts, Number of Susceptible, Number of Infected and Number of Recovered. The aggregation mode of the chart, available through the ··· menu to the right of the name can be used to visualize the data in different ways, e.g. line or bar charts, etc.

If your charts view gets cluttered, you can turn on and off different charts from the data search bar at the top.
What also become active once the model was setup, was the top right View selector. By default we are on the Variables view, showing the numeric outputs of the model. The other two views available are the Network and the Agents. Agents shows a tabular view of the agents within the model, which can be useful with small numbers of agents to check their exact properties. Network is useful to see the overall structure of the agents and their links. In this particular model, the agents are fully connected giving a uniformly distributed graph layout.

The top left menu allows to specify an attribute of each agent type to use as the scale factor for each node in the visualisation, and the top right allows to switch between different layout approaches.
Summary
Through this tutorial we have walked through the initial features to get started with, both on the console and in the definition of the models themselves. The next tutorial, based around building a model of mortgages issued by banks, goes much further into more advanced behaviours, as well as through the initial model building steps, when starting from scratch.